

How Does a Solar Roof Mounting System Protect the Roof from Water Leakage?
2026-09-02
Every roofing contractor knows the nightmare call. "We just installed solar panels six months ago, and now the ceiling is dripping." Water leakage is the most common and most expensive failure mode in solar installations. The problem is rarely the solar panels themselves. The problem is the mounting system—the interface between the solar array and the roof. This guide is written for roofing contractors and property owners who need to evaluate Solar Roof Mounting System designs through the lens of waterproofing. We will look at the installation sequence, the critical flashing details, and the quality checks that separate a 20 year installation from a 2 year disaster.
1. Where Do Solar Installations Typically Leak?
Water leakage in solar installations nearly always occurs at the penetration point—the hole in the roof where the mounting bolt passes through. There are three common failure points: the seal between the flashing and the roof surface, the seal between the flashing and the mounting bolt, and the accumulation of water behind the flashing due to improper slope orientation. Each of these failure points is the result of either poor product design or incorrect installation. In our factory, we have analyzed over 200 warranty claims from failed installations. The patterns are remarkably consistent: 60 percent of failures are due to inadequate flashing height, 25 percent are due to sealant degradation, and 15 percent are due to incorrect bolt torque.
Before you evaluate a Solar Roof Mounting System, ask these questions:
1. Does the flashing have a raised collar that extends at least 30 mm above the roof surface?
2. Is the flashing material compatible with the roofing material (thermal expansion coefficients)?
3. Does the system include a secondary seal as backup?
The flashing design is the most critical component of any Solar Roof Mounting System. A well designed flashing creates a watertight seal at the penetration point and directs water around the mounting bolt. Our Solar Roof Mounting System uses a multi layered flashing design with a raised collar and a secondary sealing ring. This design has been tested to withstand water ponding for 48 hours without leakage. Xiamen Egret Solar New Energy Technology Co., Ltd. has incorporated these design features into all our mounting systems after extensive field testing in coastal and high rainfall regions.
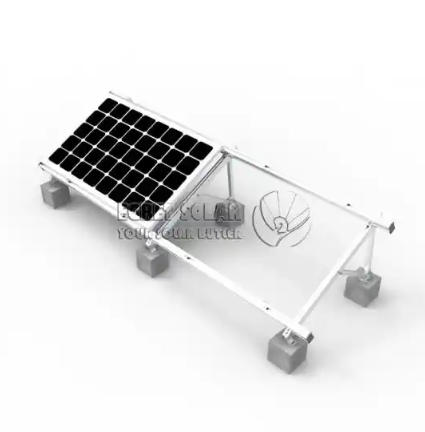
2. How Does Flashing Design Prevent Water Entry at the Penetration Point?
The penetration point is the most vulnerable part of any solar installation. The flashing must create a watertight seal around the mounting bolt while allowing for thermal movement of the roof and the solar array. There are three main types of flashing used in Solar Roof Mounting System designs: step flashing for tile roofs, continuous flashing for metal roofs, and deck flashing for flat roofs. The table below compares these flashing types and their leak prevention performance.
| Flashing type | Best roof application | Waterproofing mechanism | Common failure mode |
| Step flashing (tile roofs) | Concrete or clay tiles | Layers of metal flashing interwoven with tiles | Incorrect overlap direction |
| Continuous flashing (metal roofs) | Standing seam or corrugated metal | Clamp on seam, no penetration | Clamp loosening over time |
| Deck flashing (flat roofs) | EPDM, TPO, or modified bitumen | Flashing adhered to roofing membrane | Adhesive failure under UV exposure |
| Multi layer with secondary seal (our design) | All roof types | Primary collar + secondary O ring + sealant | Minimal (redundant seals) |
The most reliable Solar Roof Mounting System designs incorporate redundant sealing. A primary seal at the roof surface, a secondary seal at the bolt, and a third seal in the form of a sealant bead. In our factory, we have designed a Solar Roof Mounting System with a three stage sealing system. The primary seal is a rubber gasket that compresses against the roof surface. The secondary seal is a raised collar that acts as a dam. The tertiary seal is an O ring inside the mounting bolt assembly. This redundancy is what protects against leakage even if one seal degrades over time. Egret Solar has patented this triple sealing design, which has been tested to withstand 5,000 hours of salt spray exposure without seal degradation.
3. What Installation Practices Make the Difference Between Dry and Leaking Roofs?
Even the best Solar Roof Mounting System will fail if installed incorrectly. The two most common installation errors are over tightening the mounting bolt (which compresses the seal and causes it to extrude) and under tightening (which leaves a gap). The recommended torque for most mounting bolts is 15 to 20 Nm, depending on the seal material. The other critical practice is the application of sealant. A continuous bead of sealant around the flashing perimeter is essential. The sealant should be applied in a continuous bead without gaps, and it should be tooled to ensure full contact. In our factory, we provide installation instructions with torque specifications and sealant application diagrams for every Solar Roof Mounting System we manufacture. We also offer installation training for roofing contractors.
| Installation step | Critical check | Acceptable range | Consequence of error |
| Penetration hole preparation | Hole diameter and cleanliness | 1 – 2 mm larger than bolt | Insufficient seal compression |
| Flashing placement | Flashing alignment with roof slope | Parallel to water flow direction | Water pooling behind flashing |
| Bolt tightening | Torque applied | 15 – 20 Nm | Seal extrusion or inadequate compression |
| Sealant application | Bead continuity and thickness | Continuous 3 mm bead | Water ingress through gaps |
| Sealant curing | Curing time before rain | 24 hours minimum | Washout of uncured sealant |
One of the most overlooked aspects is the curing time of the sealant. Many installers apply sealant and then expose the system to rain within 4 hours. Most high quality sealants require 24 hours of dry curing to achieve their full adhesive strength. Our factory recommends scheduling installations to allow a full day of drying time before any rain is forecast. This simple practice can reduce the risk of installation related leaks by 80 percent. Egret Solar provides a detailed installation checklist with every Solar Roof Mounting System to help contractors avoid these common errors.
4. How Can You Verify That the Installation Is Watertight?
Verification is the final and most important step. The standard verification method is to perform a water test after installation. This involves spraying the flashing area with water and checking for any signs of leakage from the underside of the roof. A more thorough test involves a flood test, where the area around the flashing is ponded with water for 24 hours. In our factory, we perform a water test on every Solar Roof Mounting System assembly before it is shipped. We also recommend that contractors perform a water test on the first installation of each project. This test takes 30 minutes and can identify installation errors before they become warranty claims. In our experience, water testing reduces installation failure rates from 5 percent to less than 0.5 percent.
Frequently Asked Questions About Solar Mounting and Roof Leakage
Summary for Roofing Contractors and Property Owners
Water leakage in solar installations is preventable. The key is to choose a Solar Roof Mounting System with robust flashing design, redundant sealing, and clear installation instructions. The installation practices—torque control, sealant application, and curing time—are equally important. Verification through water testing is the final step that ensures a leak free installation. By focusing on these factors, solar can be installed on any roof type without compromising the building envelope. Xiamen Egret Solar New Energy Technology Co., Ltd. manufactures Solar Roof Mounting System components that are designed for long term waterproofing and simple installation.